White pebble tiles are an excellent choice for those seeking to introduce a natural, serene, and luxurious touch to any space. Their timeless beauty, versatility, and durability make them a popular option for homeowners, designers, and architects alike. Whether you're updating your bathroom, revamping your kitchen backsplash, or designing an outdoor area, white pebble tiles can add an elegant and unique finish to any project.
In this step-by-step guide, we will walk you through the process of installing white pebble tiles, from choosing the right materials to the final steps of sealing and maintaining your newly tiled space. If you're looking to add white pebble tiles to your design, look no further than the White Pebble Tile from Pebble Tile Shop. This product combines natural stone beauty with durability and ease of installation.
By the end of this article, you’ll have all the knowledge necessary to install white pebble tiles like a professional. Let’s dive into the world of pebble tile installation and get your project started the right way.
Table of Contents
-
What Are White Pebble Tiles?
-
Why Choose White Pebble Tiles?
-
Where to Use White Pebble Tiles
-
Tools and Materials You’ll Need
-
Preparing for Installation
-
Step-by-Step Guide to Installing White Pebble Tiles
-
Common Mistakes to Avoid
-
Post-Installation Care and Maintenance
-
Conclusion
1. What Are White Pebble Tiles?
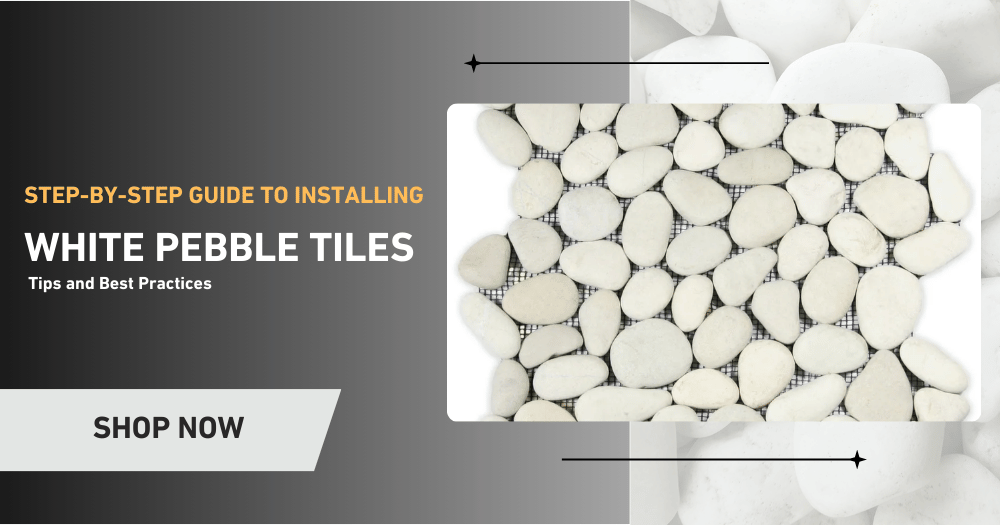
White pebble tiles are made from small, smooth, natural stones that are typically arranged on a mesh backing to make them easier to install. The pebbles are carefully sourced from rivers, beaches, or quarries and are cut or shaped to create uniform slices or whole stones. These tiles can either feature whole pebbles or be sliced into smaller, flatter pieces, offering different textures and visual effects.
The White Pebble Tile offered by Pebble Tile Shop features a mix of pristine white pebbles, making them perfect for creating a clean, fresh look in any space. These tiles are ideal for adding a sense of calm, light, and natural beauty to both interior and exterior designs.
2. Why Choose White Pebble Tiles?
White pebble tiles come with a range of benefits that make them an excellent choice for various design projects. Here are some reasons why you should consider using white pebble tiles in your next project:
1. Natural Aesthetic
White pebble tiles add a natural texture to any surface, bringing the outdoors inside. Their smooth, rounded stones are visually stunning and create a sense of serenity and tranquility in any space.
2. Timeless Elegance
The subtle, neutral color of white pebbles makes them timeless. Whether you're designing a modern bathroom or a more traditional outdoor area, white pebble tiles can complement a wide variety of design themes.
3. Durability
Pebble tiles are made from natural stone, which means they are highly durable. White pebble tiles are no exception—resistant to wear and tear, moisture, and even some forms of chemical damage. This makes them ideal for areas with high traffic, such as floors, and for wet zones like showers.
4. Easy to Clean and Maintain
While natural stone may require some maintenance, white pebble tiles are relatively low-maintenance. The smooth surface of the tiles reduces the accumulation of dirt, and a quick wipe-down or gentle scrub will keep them looking fresh.
5. Versatility
White pebble tiles are incredibly versatile. Their understated color complements both bold and minimalist designs. They are suitable for both indoor and outdoor use and can be applied to floors, walls, backsplashes, shower floors, or outdoor patios.
3. Where to Use White Pebble Tiles
White pebble tiles can be used in a variety of spaces and applications, enhancing the look of both indoor and outdoor environments. Here are some popular areas where these tiles shine:
1. Bathroom Floors and Showers
White pebble tiles are perfect for bathroom installations. Their smooth texture makes them a great choice for shower floors, where water flow is constant. The pebbles’ natural appearance enhances the spa-like atmosphere, creating a luxurious retreat at home.
2. Kitchen Backsplashes
Create a striking focal point in your kitchen by installing white pebble tiles as a backsplash. The glossy white pebbles will add texture and depth to your kitchen while maintaining a clean and fresh look.
3. Outdoor Patios or Pool Decks
White pebble tiles are durable enough for outdoor use. They can create a stylish and functional patio, poolside area, or walkway. The bright, clean look of white pebbles adds an elegant touch to any outdoor space.
4. Accent Walls
Adding white pebble tiles to an accent wall creates a visually dynamic and textured feature in a room. Use it in a living room, entryway, or even a feature wall in your bathroom to make a statement.
5. Flooring in High-Traffic Areas
White pebble tiles are not just beautiful but also highly durable, making them perfect for flooring in high-traffic areas. Whether it’s a hallway or kitchen floor, the tough surface will withstand daily use.
4. Tools and Materials You’ll Need
Before you begin the installation of your white pebble tiles, it's essential to gather all the necessary tools and materials. Here’s a comprehensive list of what you’ll need for a successful tile installation:
1. White Pebble Tiles
Of course, the most important material you need is the white pebble tiles themselves. Be sure to purchase enough tiles to cover the entire area. It’s a good idea to buy a little extra in case any tiles break during installation or if you need to make adjustments.
2. Tile Adhesive
Choose an adhesive that is specifically designed for natural stone tiles. A high-quality thin-set mortar is recommended for most pebble tile applications, as it provides a strong bond between the tile and the surface.
3. Tile Cutter or Wet Saw
If you need to cut tiles to fit specific areas, a tile cutter or wet saw is essential. A wet saw will help you achieve clean, precise cuts without damaging the tiles.
4. Notched Trowel
A notched trowel helps you spread the adhesive evenly and ensures the right amount of adhesive is applied to the surface. This is important for a secure bond.
5. Tile Spacers
Tile spacers are used to create uniform gaps between tiles, ensuring that the grout lines are straight and even. For pebble tiles, you may need smaller spacers to account for the slight variation in the pebbles’ size.
6. Rubber Float
A rubber float is used to spread grout evenly over the surface and press it into the gaps between the tiles. This tool is essential for the grouting process.
7. Tile Grout
Choose a grout that complements the color of your white pebble tiles. Dark grout can create a contrast, highlighting the individual pebbles, while a lighter grout can blend seamlessly with the tiles.
8. Sponge and Clean Water
After grouting, a damp sponge is used to wipe off excess grout and clean the tiles. This helps avoid grout haze on the surface of the tiles.
9. Leveling Tools
You’ll want to ensure that your tiles are level as you lay them down. A level or leveling system will help you achieve a flat, uniform surface.
5. Preparing for Installation
Proper preparation is essential to ensure a successful installation. Here are the steps to take before starting the tile installation:
1. Clean the Surface
Ensure the surface where you plan to install the tiles is clean, dry, and free of dust, dirt, and debris. This helps the adhesive bond properly.
2. Plan the Layout
Before applying adhesive, plan the layout of your tiles. Lay out the tiles without adhesive to ensure the design flows smoothly and there are no awkward cuts at the edges.
3. Cut Tiles as Needed
If you need to cut tiles to fit edges or corners, use a tile cutter or wet saw to make precise cuts. Always measure carefully before cutting to avoid wasting tiles.
6. Step-by-Step Guide to Installing White Pebble Tiles
Now that you have everything prepared, it’s time to begin the installation. Follow these step-by-step instructions to ensure a successful outcome.
1. Apply Tile Adhesive
Using a notched trowel, apply a thin layer of tile adhesive to a small section of the surface. Spread it evenly and make sure it covers the entire area where tiles will be placed.
2. Place the Tiles
Press the white pebble tiles firmly onto the adhesive. Use tile spacers between the tiles to ensure consistent gaps. Be sure to check for level as you go along to maintain a smooth, even surface.
3. Cut Tiles to Fit
When you reach the edges of the area, you may need to cut tiles to fit around corners or borders. Use a wet saw or tile cutter to make the necessary cuts.
4. Allow Adhesive to Set
Let the adhesive dry for the recommended amount of time—usually 24 hours—before moving on to the grouting process.
5. Apply Grout
Once the adhesive is set, use a rubber float to apply grout between the tiles. Press the grout into the spaces, ensuring it fills the gaps completely. Wipe off any excess grout with a damp sponge.
6. Clean the Tiles
After the grout has set, clean the surface of the tiles with a damp sponge to remove any grout haze. Buff the tiles with a dry cloth to bring out their natural shine.
7. Seal the Tiles
Finally, consider applying a stone sealer to protect your tiles from moisture and stains. This step is especially important for areas with high water exposure, such as bathrooms and kitchens.
7. Common Mistakes to Avoid
While installing white pebble tiles is relatively straightforward, there are a few common mistakes to watch out for:
-
Not Preparing the Surface Properly: If the surface is not clean or smooth, the tiles may not adhere properly. Always clean and prep the area before installation.
-
Skipping Tile Spacers: Tile spacers ensure that the grout lines are even and consistent. Avoid the temptation to skip this step.
-
Using the Wrong Adhesive: Make sure to use an adhesive that is specifically formulated for natural stone tiles.
-
Not Sealing the Tiles: Sealing helps protect the tiles from moisture and stains. Be sure to apply a good-quality sealer to maintain the beauty of your installation.
8. Post-Installation Care and Maintenance
White pebble tiles are relatively low-maintenance, but proper care will help them last longer and keep them looking beautiful. Here are some maintenance tips:
-
Regular Cleaning: Sweep the area regularly to remove dust and debris. Wipe the tiles down with a mild, pH-neutral cleaner.
-
Sealing: Periodically reseal the tiles, especially in high-moisture areas, to maintain their protective barrier.
-
Avoid Harsh Chemicals: Use only gentle cleaning products that won’t damage the natural stone of the tiles.
9. Conclusion
Installing pebble tiles is a rewarding project that adds beauty, durability, and a touch of nature to any space. Whether you're upgrading your bathroom, kitchen, or outdoor area, these tiles offer timeless elegance and versatility.
For the highest-quality white pebble tiles, visit Pebble Tile Shop. Our range of pebble tiles is carefully selected to ensure that your design projects achieve the perfect blend of style and functionality.
Also, be sure to explore Tile Hub, a sister company of Pebble Tile Shop, for even more tile options for your next home improvement project.
Choose the beauty and durability of white pebble tiles, and transform your space today!